Showing posts with label Keeper of the Home. Show all posts

Friday, June 01, 2012

Black Thumb

Both of my parents are wonderful gardeners. Their yard is perfectly landscaped and they enjoy spending time working to keep it looking great. My mom always has a ton of flowers planted in the flower beds, pots around the yard, and hanging baskets on the porch. Growing up, when people would find out where I lived, they would usually make a comment about how pretty our yard was. Dad has done a great job landscaping all of the yard. It looks professionally done.

Let's just say their gardening abilities were not passed down to me. I don't know if they were passed down to my other siblings. I haven't seen any evidence of it. But I can't keep a plant alive for anything!

Case in point #1:


This poinsettia was given to us as a housewarming gift when we first moved here. It was so full and beautiful. Once the Christmas season was over, it got moved to our patio. It's still alive, but pretty sad looking. I might remember to put some water in it once a week or so. Poor poinsettia.

Case in point #2:

Chris bought this hanging basket shortly after we moved in. Like the poinsettia, it was full and beautiful and really helped brighten up the front entrance. I did really well remembering to water it at first, but it slowly started slipping my mind. Once it got to sad and unattractive for the front of the house, it was also moved to the patio. I was excited that the one measly flower popped up after I watered it one day this week. It really is a sad, sad story.

Up until last week, those were the only two plants we had under our care. Our yard is beautifully landscaped, but the landlords pay someone to take care of it. Very wise choice on their part!

Last week, we added a new plant to our care:


We bought this beauty at IKEA for only $1.99! I thought that was a good price to pay for something that might end up dead in a few months. The cute pot was also only $1.99. The best part about this plant: it only needs to be watered every 5-6 days! The instructions say that it needs to be completely dry before watering again. Perfect for me!

I have high hopes for this little guy! Perhaps my black thumb will begin turning shades of green.

Monday, March 19, 2012

For the Home, Made at Home

I've posted previously about making homemade laundry detergent. I'm still making it and using it, although I have tweaked the recipe some. I still like using it for the cost efficiency, but I've been having some problems with the clothes smelling a little sour. I'm not sure if it's the water here or something about the detergent. I've tried adding essential oil, which helped some. My next thought is to try the Downy Unstoppables or Gain Scent Booster products. But, that would kind of take away from the cost efficiency and chemical free aspects.

I have recently added 2 more products to my homemade list: fabric softener and makeup remover. I found the idea and recipe for the fabric softener from the blog, One Good Thing. I used 1 bottle of Suave conditioner, 6 cups of water, and 3 cups of white vinegar. I mixed up well and poured it into a clean milk carton. I keep a mason jar filled about 2/3 full of the softener with a strip of an old t-shirt. I just pull the t-shirt strip out and throw it into the dryer with my clothes. I don't notice any difference from using this compared to using the store bought dryer sheets. It cost me around a dollar to make 1/2 a gallon of fabric softener!

The makeup remover recipe also came from One Good Thing blog. (This is a blog, by the way!) I heated 1 cup of water for about a minute, dissolved 1 Tbsp coconut oil in the water, and added 1 1/2 Tbsp baby shampoo. I'm storing it in a pint size mason jar. I just dip a cotton ball into the makeup remover and wipe off the makeup. It really works great and smells wonderful! I keep coconut oil on hand, so all I had to buy for this was the baby shampoo. I found a big bottle for about $1.50 at Wal-Mart.

Since I've mentioned it, I want to tell you how much I love coconut oil! I keep a jar and use it on my face, legs, hands, and even on my hair for smoothness. A little bit goes a long way! It is the only thing I have found that I can use on my legs after shaving that doesn't burn like crazy. Heres a list of 52 Uses for Coconut Oil. And here is a whole website dedicated to the use of coconut oil.

Saturday, March 17, 2012

Strawberries

Last Saturday, we visited the Strawberry Festival here in Plant City. These folks around here are really proud of their strawberries! Not that it's a bad thing, because they certainly are delicious! As we were leaving the Festival I bought us a flat of the prettiest strawberries you ever have seen. Once I got them home and realized just how many strawberries are in a flat, the wheels started turning trying to figure out what I was going to do with all of them before they started going bad.

I found this idea on Pinterest for dried strawberries in the oven. The directions say to dry halved or quartered strawberries for 3 hours at 100C/210F. Well, I had a blonde moment and tried to set the oven at 100 degrees. My oven would only let me turn it down to 170, so I dried them at that temperature for around 3 hours. My dried strawberries didn't turn out as vibrant and plump as the picture from the website makes them look. They were kind of mushy, but still tasted pretty good. Maybe if I try baking them at the right temperature, they might not be so mushy.

Their strawberries...

My strawberries.

I also attempted to make some strawberry jelly. I found Martha Stewart's recipe for Quick Strawberry Jam. It sounded easy enough and I had all the ingredients. I was a little skeptical that it didn't use any pectin or gelling agent, but I thought if Martha Stewart approved then it was good enough for me!


My jelly/jam turned out a little thin. It's more like syrup than jam. Grandma and I had it on some pancakes this morning and it is delicious! It did thicken up some in the refrigerator, but still not quite as thick as jam.
Strawberry jam/syrup on pancakes. Yum, yum!

We have been eating a fair amount of strawberries for breakfast and snacks. I also froze some to use in smoothies after the season is over.

Sunday, February 05, 2012

Craft Room Closeups

As I was planning my craft room, I wanted to do something cute, practical, and cheap. With the hopes that it will eventually be turned into a nursery, I didn't want to spend a lot of money fixing it all up for my crafting. I feel like I accomplished this goal pretty well. Of course, I always spend more money than I was planning!

I already posted about the embroidery hoop wall. Above my sewing area, I wanted to do something that would provide storage along with being visually appealing. I bought unfinished wood boxes at Michael's and picked out paint colors to match the fabric in the embroidery hoops. I used scrapbook paper on the bottom of the boxes and covered it with a few good coats of Mod Podge. I was thankful for Chris' help with hanging the boxes. I LOVE how they turned out! They're great to hold some of my sewing and crafting supplies.

I also needed an area by my desk to hold my countless lists and notes. I found a cork board on sale at Micheal's for about $3 and painted the trim on it to match the boxes. I also bought a small pizza pan at Dollar Tree and spray painted it for a magnet board. I had put together a dry erase board using a picture frame, but it broke in the process of hanging it up. So, I just stuck with the magnet and cork boards.

I've seen this idea floating around Pinterest using a picture frame and wire to display pictures. I love the shabby chic look so this was right up my alley! I was super excited to find a picture from in the clearance/damaged section at Michael's. It didn't have the glass in it (which I didn't need anyway), so it was marked down from $40 to $10. I spray painted it the same color as the magnet board, fastened some wire to the back, and displayed some pictures with adorable clothespins I found in the dollar bin at Michael's.

One other touch of my room that I love is this wall hanging. It was given to me as a gift at the end of my first (and only) year teaching in Illinois. A parent of one of my students made it for me. I absolutely love it!

The poem reads:

The Choice

"You could have chose to teach, where the grades are A-B-C's.
Instead your students make their marks in measured IEP's.

You could be simply standing in front of your classroom all day long,
Instead you're bending, stretching, lifting, while trying to stay strong.

You could have conversations with your students, deep in thought,
Instead you praise the effort of one tiny little grunt.

You may not think I noticed, that you could have had much more,
That you could have chose a different path, a different classroom door.

But you chose to be with us, picked the hardest job to do,
To make a difference in the lives of kids who cannot choose.

Words cannot come out to tell you how much that means to me,
My eyes try to convey the thoughts of how it feels to see.

How I wish that I was able to come to you and say,
How hard it will be to leave you, to grow up, and be on my way.

If only you could hear the gratitude spoken by my own voice...
Instead, just know how much I love you for making this choice."

By Sherry Schultz

I love it because it perfectly describes the wonderful, life-changing year I had teaching students with severe disabilities. It's a great reminder and inspiration to me!


Wednesday, February 01, 2012

Craft Room

The craft room is mostly put together and ready to be used! I am really liking the way it turned out. It's cute, inspirational, functional, and didn't cost a fortune to decorate! There are still a few small things that need to be done, but those will happen with time.

Looking into the room from the door.

Extra twin bed and hutch for fabric storage.

Closer look at sewing area...I will do a post about the boxes on the wall soon.

Inside of hutch with fabric storage. I need to organize this a little better and find a better storage solution for all the ribbon on the top shelf.

Book shelf on the wall coming into the room (you can see the door on the right side of the picture). I need to find some fabric to put in the window.

Stay tuned for more detailed posts about the projects I did around the room and my favorite touches!

Now I'm off to do some sewing!

Friday, January 27, 2012

Recipe Reviews

So, remember my goal of trying one new recipe a week and posting a review? Yeah, that's not going so well. I have tried a few new recipes so far this month. I'll do my best to combine reviews in this post.

Chicken Rollups


This was an interesting recipe. I was a little skeptical about it from the start, because of the issue with the crescent rolls being baked in a sauce. Can you say soggy bread? But, the picture looks so yummy that I wanted to try it.

My additions:
I added bacon into the cream cheese and chicken filling mixture. I also added a little sour cream to the sauce and the filling.

Taste:
The flavor was alright, but not exceptional. I got it a little too salty, probably because I added the bacon. Otherwise, the flavor was a little one-dimensional. It needed something to jazz it up or add a little pop.

As I was afraid, the texture was a bit icky. The crescent rolls were soggy, which wasn't so yummy in my mouth.

Ease:
This was a fairly time-consuming recipe. I sauteed some onions and cooked the chicken as I was making the dish, which added some time. If you had pre-cooked chicken and didn't add onions, the prep work wouldn't be as time consuming.

Overall:
2 1/2 out of 5 stars

Hawaiian Sweet Roll Ham Sandwiches


I made this dish for Friday night supper of our annual meeting. I had been seeing it float around Pinterest for quite some time and was anxious to try it. The ingredients were a bit expensive, but not outrageous.

My additions/changes:
I didn't use the Hawaiian Sweet Rolls. I could only find a small package and they were super expensive. I used small potato rolls instead, which I thought were good.

Taste:
This was a winner in the taste category! Every last crumb was eaten. The combination of the sweetness from the rolls, spiciness of the Dijon, and the zing from the poppy seeds was a perfect blend.

Ease:
The great thing about this recipe is that it can be put together earlier in the day, kept in the refrigerator, then just popped in the oven before time to serve. It's a perfect potluck dish or would be great for Superbowl Sunday.

Overall:
Five stars!

Cabbage Rolls - - my combination of two recipes


I was visiting with my Grandma when they were here over the holidays and we got to talking about ideas for suppers. I asked her what kinds of dishes she likes to fix with ground beef. One dish she said she fixes often is cabbage rolls. I had never heard of them, but it sounded good from her description. I hunted for a good recipe and ended up combining two recipes.

My additions/changes:
I sauteed half an onion in butter and added a pound of ground beef to let it brown just a little. I don't like putting raw ground beef in the crock pot. It just weirds me out. I added 1/2 cup brown rice, one small can of tomato sauce, salt, pepper, garlic powder, basil, oregano, celery seed, dill, paprika, and a dash of cayenne. I didn't have a package of onion soup mix like the first recipe calls for, so I just threw in some spices I thought would taste good. Once I rolled the filling in the cabbage leaves (I had to look up a video on how to core cabbage!), I made a sauce out of tomato soup and beef broth. I cooked it in the crock pot for about 5 1/2 hours.

Taste:
I really liked this dish! It smelled delicious as it was cooking and made my mouth water all day. I thought the flavor was just right, but Chris said it was a little too sweet. I really liked the taste of the cooked cabbage with the meat filling.

Ease:
This was a little time consuming to prep. The good thing is that you can do it earlier in the day and have supper done. It does make a mess and uses a lot of dishes to get it together. If you don't brown the ground beef, then you could mix the filling up in one bowl and use another bowl to steam the cabbage. Then you wouldn't have as many dishes. But I seem to like to dirty a lot of dishes as I'm cooking.

Overall:
Four stars (I would give it 5, but I gave it 4 since Chris wasn't a huge fan.)


Friday, January 20, 2012

Closet Organization

One of the first things I did after we moved in was hang all my clothes in the closet. After that, the closet didn't get much attention. I just tossed my things in there, sometimes putting them in a logical place, but not usually. Every time I would walk in, I would tell myself I needed to work on cleaning and organizing it. I finally got around to it this afternoon!

This is how my closet typically looks....


One reason I've hesitated on getting it organized is that I was trying to come up with a solution to display/store my jewelry. I have a small jewelry box on my dresser for my nicer stuff, but I have a TON of necklaces! I've been browsing around Pinterest and came up with a few ideas.


Link
[source]

I decided the last idea would be the best use of the space I have and hold the most necklaces. I bought the towel rod and shower curtain hooks at Wal-mart. I started hanging the towel rod on Tuesday night, but didn't get very far. I was determined to do it myself. I took out the instructions (which were clearly for a man because they were just pictures and no words), marked the spot for screws on the wall, and went to find the drill. The drill didn't have a bit in it and there's no telling where I could find them in our garage. So, I got frustrated and stopped.

I am happy to say that I completed this project by myself today! I found a different drill and went to work. Once I had it installed, I stood back to admire my work. It was very much a "I-am-woman-hear-me-roar"moment.

Here's how my closet looks now!


And a close up of my necklace holder.


Tuesday, January 17, 2012

Touches to the craft room

I've slowly been adding little touches to my craft room. I came across this idea on Pinterest. Now, I can't seem to link it back to the rightful owner. So I'm stealing someone's idea without giving them credit!


I love how this turned out! It adds just a little extra pop and interest above the bed. This was such an easy and relatively inexpensive project. All of the supplies came from my favorite place, Hobby Lobby. The total for all the supplies was around $25, but that included a lot of extra fabric for future projects. The hardest part of the whole deal was getting it hung up on the wall in a manner that looked appealing to the eye, but not too perfect.

I'm linking this project up to the Pinterest Partayy going on over at What the Graham?!, Baby Gator Den, Design Build Love, Hernando House, Merrypad, and The Stucco Bungalow. Head on over to these great bloggers to see other awesome projects inspired by Pinterest!

Wednesday, January 11, 2012

Craft Room Sneak Peek

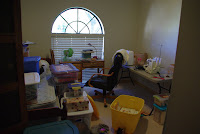
My craft room has gone from this:


to this:


I still have a lot more organizing, decorating, and sprucing up to do before I do a big reveal. Stay tuned!

Saturday, January 07, 2012

2012 Goals


And now I will share my goals for 2012.
  • Read through the entire Bible in chronological order. A sweet sister in the church shared this website (Read the Bible in One Year) with me. It allows you to select whether you want to read the Bible through from the beginning, in chronological order, historical order, or passages from the Old and New Testament each day. I'm really excited to read through the Old Testament in chronological order.
  • Learn to quilt. I'm going to have a new niece or nephew in June, as well as an adopted niece or nephew (my best friend's first baby!) in June. I hope to make a quilt for both of them.
  • Run at least 25 miles a month, for a total of 300 miles for the year.
  • Read 50 books. I have a list of books that I didn't get to last year, plus a new long list. I'm sure there will be others added to it as the year goes on!
  • Try one new recipe a week and post a review. This isn't really difficult for me, because I love trying new recipes. Posting the review might be more of a challenge!
  • Take one picture each day. I'm already behind on this, because I didn't decide to make this a goal until a few days ago. But, I'll give myself some grace and take a few extras to make up!
  • Learn more about blog design. I want to learn to make my blog more personalized and attractive my lovely readers. I'm a little tired of the cookie-cutter templates and functions.
  • Send one handwritten note each week. This is a repeat from last year, but something I still want to work on becoming more of a habit.

Here's to a year full of learning, growth, and fun!

Thursday, January 05, 2012

So how about those 2011 goals?

Like most people, I started out 2011 with a list of goals to accomplish throughout the year. The year brought about a few extra surprises, thus I didn't do so well at achieving those goals.

My goals for 2011 were (how I came out on those goals is in red):

  • read the Bible through (using The One-Year Bible published by Tyndale) - - I successfully read through the Bible! As always, it was an enlightening experience. There were times when it was difficult and I got behind a few days, but I managed to finish.
  • eat more fresh fruits and vegetables - - I can now say there are a whole lot of "new" vegetables that I like as of this year! I really like starting my day with a raw spinach, banana, almond milk, and peanut butter smoothie. The produce aisle at the grocery store has become one of my favorite spots! I'm so thankful to be living in an area where produce is easily accessible year-round.
  • send one handwritten note a week (not starting out so well on this one!) - - Well....this was a good thought, but was not carried out so well. I often thought about people I needed to write, but I would let other things get in the way.
  • call my grandparents more often - - I feel like I did pretty well with this. I tried to call one of my grandparents every week. I know I need to do better with this. It is always encouraging and comforting to talk with my grandparents. We live so far out from all of them and usually only get to see them once a year. Making a conscious effort to call regularly helps to stay connected.
  • run 3 miles in under 30 minutes -- I'm not sure that I can say I can consistently run 3 miles in under 30 minutes, but I have done it on several occasions. It is easier for me to run 3 miles than it was at the beginning of last year, but I'm still far from being a "runner."
  • learn to knit -- Nope, didn't even try to learn!
  • read 50 books - - I was 15 books short of my goal! Actually, since I read through the entire Bible, you could say that I read 107 books this year! :)
  • stick to a grocery budget - - HA! I always had a budget in mind for each month and did really well on my big grocery trip at the beginning of the month. But, all those little trips here and there get to us!
  • intentionally save money - - I'm going to say that I half-way accomplished this goal. I was able to save a good chunk of my Christmas/birthday money (from 2010) throughout the year and still haven't spent it! We were fairly diligent about saving for our Disney trip and a few other things, but not nearly as much as I had hoped.

Sunday, October 30, 2011

Fried Chicken

One of my favorite memories of visiting my grandparents in Mississippi is of Grandma Kate making her fried chicken. After Chris and I got married, I asked Grandma to show me how she makes her chicken. My recipe is similar to hers, but I've changed a few things to suit us. I took advantage of having my friend, Shelly, visiting to make some fried chicken. I usually don't pay close attention to measuring the ingredients, but I did this time! Shelly was great to write out what I was doing and take pictures of the step-by-step process.

I use about a 3-4 lb. chicken, which is always plenty for the three of us. I buy my chicken whole and butcher (cut up) it myself. I have tried buying the pre-cut chicken, but it was too expensive! You could use this same method if you would rather just fry up a half or quarter of a chicken.

First, you need to wash and cut up the chicken. If you don't know how to cut up a chicken, I would suggest watching a few videos about it. Grandma showed me how to cut it up, but I've since forgotten the right way to do it. So, I end up doing a crazy butchering job on the poor bird!

Once the chicken is cut up, soak it in 1/4 cup of salt dissolved in 6 cups of warm water. (This doesn't need to be exact, but it's what I measured out.) I soak it in the refrigerator for 2-3 hours. This helps make the chicken extra moist and salty throughout.

When the chicken has soaked and you're ready to fry the birdie, you need to get the battering process prepped.

We like a double crust on our chicken. I coat it in the flour mixture, dip in the milk/egg, then coat in flour again. If you don't prefer this, you can just do the milk/egg mixture, then the flour.

You want to pat the chicken pieces dry as you pull them out of the salt water. This will help the batter stick better.

The first flour mixture is: 1 cup flour, 1/2 tablespoon salt, 1 1/2 teaspoon pepper, 1/2 teaspoon garlic powder, and 1/2 teaspoon paprika.

Mix eggs and 1/4 cup milk with a dash of salt and pepper.

The final flour mixture is: 1 1/2 cups of flour, 1/2 tablespoon of salt, 2 teaspoons pepper, 1/2 teaspoon garlic powder, and 1/2 teaspoon paprika. (Just a note: I use sea salt in my mixture. I really like how this turned out, because the salt is rather prominent when it is fried up. We like salt, just saying.)

There will be flour left over when you're done with battering the chicken. I'm sorry if this bothers you, but you'll just have to get over it. I have tried starting with less, but I hate running out and having to add more as I'm going along. It really ruins the proportions.

As you're chicken is getting prepped, heat the oil in a skillet. We have a large cast iron skillet that is especially for frying chicken. I fill the skillet about 2/3 full of vegetable oil. Whatever size skillet you use, just make sure there is about 2-3 inches of space at the top. You don't want your grease to spill out or splash out once the chicken is added. My grandma fries hers up in an electric skillet and it works great too.

Once the oil is hot, I put in a few pieces of chicken. I try to get a good mixture of pieces in each frying batch. That way when it's time to eat there is a good variety that is hot and fresh.

Fry each batch for about 15-18 minutes on med/high heat, turning halfway through. If I were really good at this, I would have used a thermometer to tell you how hot the oil was. But, I'm not that good.
While you wait on your birdie to cook, you can take pictures of yourself in your super cute apron. Mine was a Christmas gift from my sister-in-law last Christmas. I just love it!

Or of the dog looking oh-so-cute and hopeful that he will get to taste the bird. Too bad, so sad.

Once the chicken looks golden brown, take it out to drain. I drain mine on a plate with a paper towel. However, I recently read that it's best to drain it on a wire rack inside a cookie sheet. I forgot about that little tip. This helps it stay crispy while the other batches are cooking.

And now the best part....

I recommend serving with fresh green beans and mashed potatoes.

I would also recommend this recipe for dessert.

Double Crusted Fried Chicken

Ingredients::

3-4 lb. chicken

Salt water mixture:

¼ cup salt

6 cups warm water

Batter:

2 ½ cups flour

1 T. salt

3 ½ t. black pepper
1 t. garlic powder

1 t. paprika

4 eggs

1/4 cup milk

Directions:

1. Wash chicken and take out insides. Cut into pieces, discarding skin as necessary.

2. Soak chicken in salt water mixture in refrigerator for 2-3 hours.

3. Prepare batter in 3 dishes:

  • 1st flour mixture: 1 cup flour, 1/2 tablespoon salt, 1 1/2 teaspoon black pepper, 1/2 teaspoon garlic powder, 1/2 teaspoon paprika
  • Egg wash: 4 eggs, 1/4 cup milk, dash of salt and pepper
  • 2nd flour mixture: 1 1/2 cup flour, 1/2 tablespoon salt, 2 teaspoons black pepper, 1/2 teaspoon garlic powder, 1/2 teaspoon paprika
4. Pat chicken pieces dry from salt water mixture. Coat in first flour mixture, dip in egg wash, coat in second flour mixture

5. Heat oil in large skillet, leaving 2-3 inches of space at top of skillet

6. Fry chicken on med/high for 15-18 minutes, until golden brown

7. Remove from oil and let drain on paper towel or wire rack